6 Baking Techniques Every Home Cook Should Master
Baking is a hobby loved by young and old, men and women alike – and even if you are not a baker yourself we can all agree to a particular love for tasty, freshly-baked goods! But, to ensure that your creations are as good as can be, there are a few basic techniques that need to be learnt and mastered.
Whether you are an advanced or amateur baker, there is always room for improvement and new techniques to learn. But, before you can master some of the advanced techniques, it is best to ensure that you are a pro at the basics.
Let’s take a look at six baking techniques that every home cook should master!
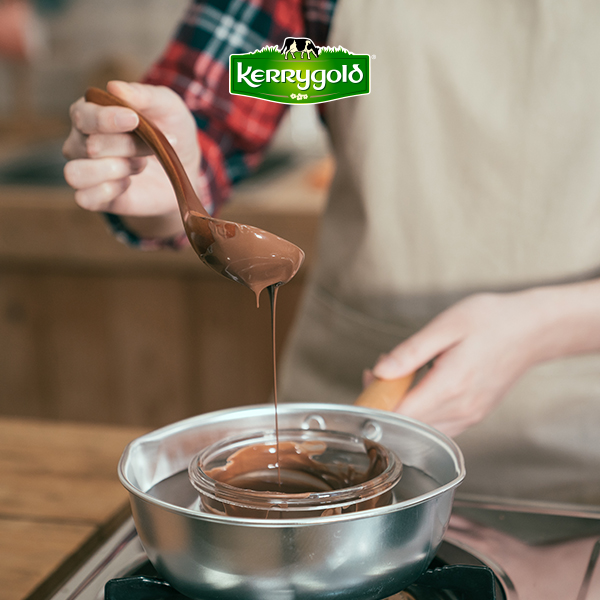
1. Melting Chocolate
Chocolate is one of the most commonly used ingredients in any baker’s kitchen and knowing how to melt chocolate perfectly is an essential baking technique to master.
The easiest way to melt chocolate perfectly is on the stovetop over a pot of hot water. Break your chocolate into small chunks and place it in a heatproof bowl. Then place the bowl on top of a medium pot filled with 1cm of water.
Allow the chocolate to melt for a few minutes before stirring. Take care not to allow the base of the bowl to touch the hot water – the steam will do all the melting.
Pro Tip: Add a dash of ground salt to the chocolate to enhance the chocolatey flavour.
2. Creaming Butter & Sugar
Being able to cream your butter and sugar correctly will make the consistency of your baked goods lighter and fluffier, making it quite an important technique to learn.
Mixing Kerrygold butter and sugar is best done when the butter has reached room temperature as this makes it easier to work with.
Mixing incorporates air into your ingredients to achieve the ideal consistency. Place the correct amount of butter and sugar into the stand mixer and mix the contents until pale in colour. It is possible to over-mix your butter and sugar so make sure to watch the colour!
Pro Tip: Manual mixing allows you to better control the amount of air you want in the mixture and can achieve a better result. However, using a stand mixer is advised for baking novices.
3. Piping
Making pretty shapes and patterns on your cakes, tarts, and biscuits can all be achieved with a piping bag. You might not always have the proper equipment at hand so learning to make a homemade piping bag is essential for every baker!
A DIY piping bag is really easy to make. All you will need is a ZipLock bag, the mixture and a scissor. Place the mixture into one of the corners of the ZipLock bag then twist the top closed so none of the mixture will run out.
Then, cut the tip of the corner off so that the mixture can be squeezed out. Make sure to cut the hole the right size: if it is too small you will struggle to get any of the mixture out and if it is too large the mixture will come out too quickly.
Pro Tip: Cut a smaller hole in the bag for more precise work; you can always make the hole bigger if needed.
4. Whisking Egg Whites
Whisking egg whites is no longer as labour intensive as it used to be back in the day when everything had to be done by hand. But making perfect peaky egg whites for meringues and pavlovas can make or break your recipe.
Place the egg whites in a stand mixer with some sugar – this will give your egg whites a sweet taste and crispier texture when baked. Stop the mixer every 30 seconds to scrape the edges of the bowl to ensure even mixing.
Set the mixer to the highest setting and mix until you achieve the peaky consistency you want. Once the mixture is matte in texture and holds its shape easily you know that it is ready!
Pro Tip: If you are struggling to get the egg whites to foam, add a pinch of salt. The salt helps the protein in the egg whites to foam.
5. Kneading
Knowing how to correctly knead dough is a skill that every baker ‘kneads’ to perfect. Kneading is all about working air into your mixture to create an ideal texture and consistency in your baked goods.
Kneading dough stretches the strands of gluten in the flour and makes the dough feel more malleable. When kneading the dough it is best to follow a ‘pull and fold’ motion to force air into the mixture.
If you can stretch a piece of dough between your fingers and you can see through it without it breaking you have kneaded it perfectly!
Pro Tip: It is possible to over-knead your dough which will result in you squeezing the air out of the dough so make sure not to over-knead the mixture.
6. Blind Baking
Pre-baking or ‘blind baking’ refers to the baking of a pastry crust before pouring in the contents. This is done to ensure that the pastry crust bakes correctly and is not left soggy by the contents of the tart.
Before placing your buttery pastry crust in the oven, line your tart tin with baking paper and press the crust into the tin. The pastry tin must now be placed in the fridge for 30 minutes to firm the butter in the mixture and help the crust to keep its form.
Heat the oven to 200°C and bake the pastry crust for 15-20 minutes in the upper third of the oven until the sides are set. The pastry crust can then be moved to the lower shelf of the oven and cooked for a further five minutes.
To prevent your crust from going soggy, a thin layer of lightly beaten egg white can be brushed onto the inside of the crust before pouring in the filling.
Pro Tip: Scrunch and unfold the baking paper before placing it inside the crust tin. This helps the paper get into all the corners and edges of the tin for a better-formed crust.
***
Which essential baking technique would you add to this list? We’d love to hear your thoughts over on our Facebook, Twitter or Instagram pages.